Creating a storyboard for your next piece of content
A wee while ago, I was lucky enough to sit next to a terrific design director at my time in an Auckland advertising agency. He was the brand-lead on one of our key clients – a huge, multi-national fast-food giant. Part of his role was to scamp, or roughly illustrate, the shots that were required for the photoshoots when the client needed to show off a new product, or whenever the current suite of imagery required a bit of a refresh.
His technique was incredible. I used to think the client should have just used his scamps, rather than going to the production effort they did, showing off a bit of chicken or a burger. The detail he would go to – sauce dripping down a bun, a few crumbs flaking onto a napkin, or some spare chips falling out of the packet – it helped to get the concepts clearly across to the client, and gave enough information for the photographer, videographer and food stylist to interpret exactly what was required.
Fluid recently completed some video production content for a couple of our clients that we needed to storyboard at the beginning of the process to get our concept across. This investment at the beginning of a project can be the difference between knowing what shots you need to get and achieving the narrative you want, or being caught short with content you should have shot – but didn’t – after the shoot has wrapped. It helps early on to expose the shots you need to get in the can, the audience you’re talking to, or celebrating the product you’re trying to sell.
After receiving the brief from the client and having an initial chat with the lead creative about the concept and the types of shots required, it’s time to put stylus to Wacom and get scamping. This process is not about creating finely polished artwork, but rather rough visualisations of each shot required. For me this starts with quickly grabbing some imagery off Google and smashing it together to form the basis of the composition I need, then staying in Photoshop I use some fairly standard brushes and a few quick adjustments on the Wacom to begin drawing over the top. Adding enough detail to illustrate what I need.
Once I’ve got my shots scamped, I’ll drop them into a presentation numbered in sequential order with some notes and possibly even a time stamp to ensure the frames we’re putting forward fit into the time we’ve allowed. A ‘30 second spot goes very quickly, and unless your concept calls for it, you want to make sure your cuts aren’t too rapid or that you’re trying to cram too much in. Once the scamps have been dropped in and the storyboard is complete it’s time to get it in front of the client to sign off. Then engage the director or videographer to show the intent of the shoot. They can then weigh in on how this can all come together. Scamping up a storyboard goes far enough to make sure the client buys into the concept and not so far that there’s no room left for a videographer to make some of their own suggestions or come up with some alternatives for what you’re after.
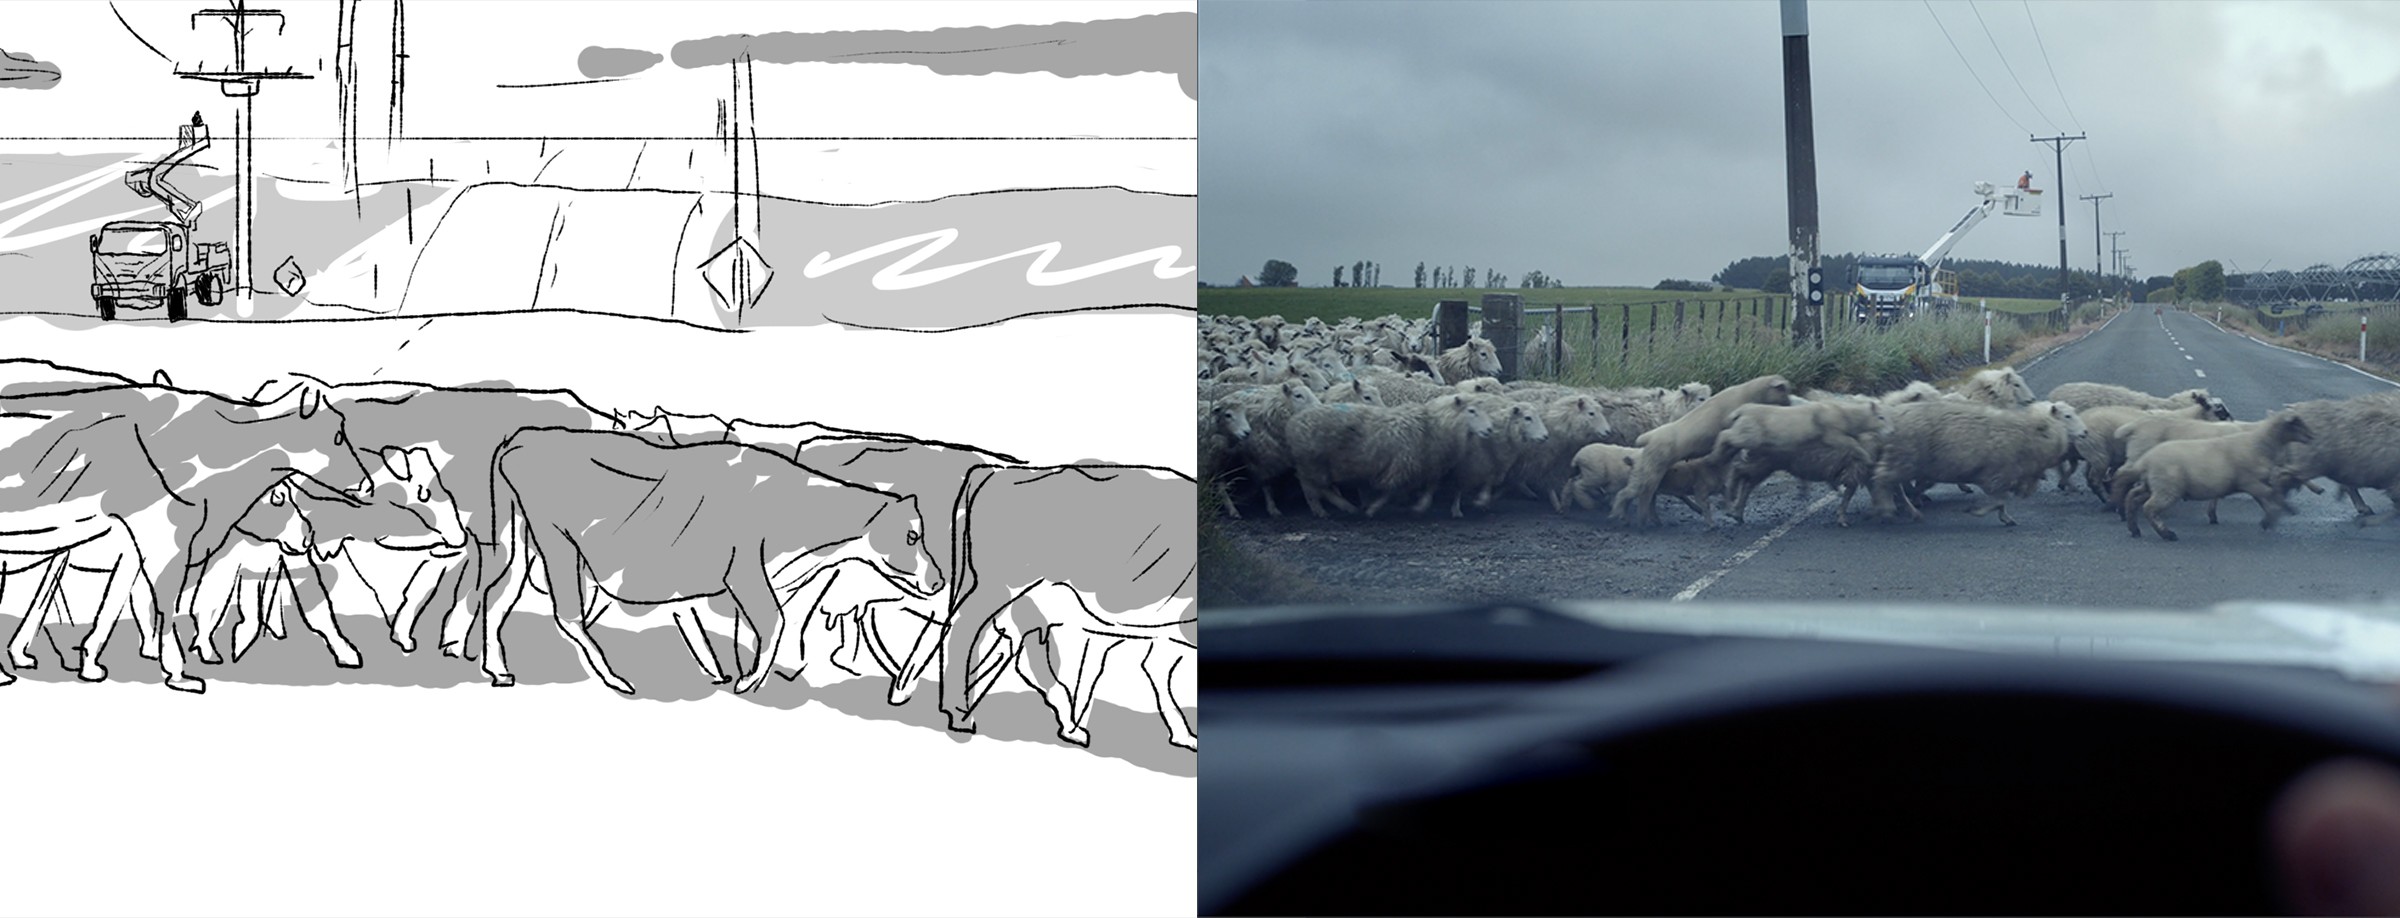
The results Fluid achieved using this approach has been hugely successful for our clients. Creating meaningful, considered video content that has remained faithful to the initial concept simply by spending the time upfront in planning out what’s needed. In these recent projects the video was created almost shot-for-shot to the original storyboard – a pretty encouraging result for someone whose kids think he just draws pictures all day at work. If only my old design director could see me now.
If you’re looking to create some new content for your brand, get in touch with Fluid. We have the know-how to get that little bit more out of a shoot by getting the concept nailed early through a solid storyboard.